440 Duplex Mobile and APRS in a Cybertruck™
Larry Higgins, W5EX
Like many of you, I have been running a mobile station for many years. My first was a 2-meter home-brewed mobile mounted in a ’37 Chrysler – in 1953.
Seven years ago, I purchased an all-electric Tesla Model 3™. Mounting for mobile use was a challenge, due to the disappearance of strong under-dash points to secure the equipment. The generous space between front seat storage box beckoned. With no holes mandated by all that plastic, I fashioned a chunk of pine 4x4 and 2x2 into a pedestal sized to slide into the cup holder space in the center console. I left the box as-is.Two Motorola CDM™ mobile control heads were easily mounted on the pine scraps. Control wires snaked to the trunk, where a 12” x 36” pine board held the 2 radios, a duplexer and a 50 amp AGM sealed battery. The antenna was a Larsen 2-70 dual-band center-loaded whip.
Why did I go to the trouble of a big old battery? Well, when I first visited the Tesla showroom, I asked about using Ham Radio in a Tesla. I was told that all non-factory radios violated the warranty. In order to avoid sending RF to the car computers via the 12 VDC buss; I opted for the AGM battery. I charged it with the superb Batteryminder™. Fearing a loop, I never charged the 400 V car battery at the same time. I asked a service person about this. He said that the computer would act crazy, if attacked by RF. I never saw any problems of this sort. I had the full self-driving “autopilot”, with the larger computer retrofitted the first year of ownership.
I mounted a GE Maxon VHF transceiver, a Byonicss Tiny-Trak 4 TNC and a diplexer scarfed from a long-gone dual band radio. The GPS receiver magnet snapped on to a trunk-ceiling strut.
After 7 years of faithful service, I traded the Model 3 for a Cybertruck™. My troubles really began! With a stainless steel exterior, hole drilling was beyond my means. A glass roof and stainless shell mean no mag-mounts.
The 50A battery was donated to another Tesla owner, and an Astron SS-30 115 VAC to 12VDC switching power supply took its place.
Re mounting the radios was a breeze. I obtained a 10” x 6’ finished pine plank and attached the radios with duplexer/diplexer in a row. The Astron power supply plugs into a
Tripp-Lite Isobar surge protector. In this service, I’m anxious to keep my switcher trash out of the Cybertruck power spigot. (So we’re using the Isobar in reverse). The Isobar plugs into a 115 VAC outlet that is conveniently positioned at the rear of the center console. The plank and radios slide cleanly under the rear seats, with plenty of air circulation. The board is secured from forward sliding by 2 bungee cords hooked to the seat frame hardware.
I first tried using the front trunk (“frunk”) lid for a mounting spot. Yes, my old trunk-lip mount from the Model 3 would fit. But where do I get power? More urgently, how do I snake the control wires into the cockpit? To this end, I spent a day, on-line service manual in hand, disassembling the frunk liner to get at the firewall. No way! The entire space is filled with machinery and there were no visible cable passages, where I might safely route control cables. With all that Tesla wiring, I was scared to attempt any blind hole drilling. I gave up
Next, I ordered a through-glass antenna mount (Larsen KG 2/70CXPL) This is a well-built but pricey answer to no holes. It didn’t work! (VSWR > 2.5) Why not? You-Tube gave the answer. The Tesla ceiling glass is with a metallic material. The interior of the truck is like a Faraday cage! This very nice antenna ended up on eBay.
At a point, good friend, Dink, WA5LNL found the cleverest approach: a special clamp machined to marry to the 2 studs inside the behind-a door, recessed light bar accessory mount at the top of each side of the cab. Unfortunately, you will need to purchase your own NMO mount and cable: These are not included in the $45 purchase price.
https://mohawkdesignsoffroad.com/products/cybertruck-nmo-antenna-mount-bracket
I then Googled “Cybertruck Ham” and came up with a break-through from the Cybertruck Owner’s Club page. Titled, “ HF, VHF-UHF antenna (for ham radio) install on my Cybertruck, works really well” by ituner-HF.
A Diamond K400C- NMO lip-mount is attached to the metal side slab behind the cab. Coax enters through the door-edge. You will need the Diamond Model C110 extension, if the radio is to be mounted at the driver’s seat.
But it isn’t that easy! I found my older mount would not fit in the available space. And the 4 set screws seemed to have no space. So I ordered the Diamond.
We Tesla owners are very fortunate to have a free illustrated on-line shop manual available. I studied this very hard. Only after 2 days’ head scratching did I figure it out.
What to do:
Go to Harbor Freight?and buy a T30 Toryx driver with a 3/8” ratchet and 6” extension.
In order to get space to tighten the Allen set screws on the clamp; you must briefly remove the “applique” slat that lies between the ceiling window and the truck bed.
Download the Cybertruck service manual. Turn to Chapter 11, “Closure Components”, and then 1120 Tonneau. Select “Tonneau Applique (Remove and Install)”
Study the heck out of the pix pages 3,5,7,8 and read the text several times. Their pix are hard to orient yourself to and mine aren’t better.
Get a rug scrap to kneel on, your T30 driver, a small flat wood chisel, and a strong light. Retract the tonneau cover and lower the tailgate. Get a short 1-step ladder and climb into the truck body. Eyeball the left and right corners where the 5’ x 6” ’ transverse slat ends. Underneath, keep looking, until you see the T-30 bolt head.
Back the 2 T30 bolts out slowly and carefully. As the shop manual says, avoid cross threading at all costs. This means that you use hand power on the 6” socket wrench, extender. As you near the end of travel of this ~ 2” bolt, you are very gentle. whilst using your hand on the extension, only.
Now an anatomy lesson. The bolts secure the front of the applique. The rear tie-down is weird. As you gently pry the applique loose with the flat chisel inserted near the ends, the panel will snap loose, revealing that the rear is captured with two U-shaped receptacles that grab a rod attached to the underside of the applique. Lift the applique gently and set it aside.
Clean the stainless side metal edge thoroughly with a soft cloth. Keep it dry. Grab your Diamond edge mount. Note the 4 set screws. Back these out over a surface that allows you to catch one backed out too far. Slip the edge connector over the protruding stainless steel edge, bolts inside. Tighten securely with the supplied Allen wrench.
Reapply the applique. You will need to match up the U-clamps to the little struts on the underside of the applique. Press down gently and you’ll hear a snap as the rods seat. With the applique so secured, insert the two Toryx T-30 bolts. Use the 3/8” extension on the Toryx T-30 tool to very gently start the bolt w/o cross threading. Do not apply the ratchet, until you are absolutely certain that you have not cross-threaded.
Alternately snug up each bolt with the T-30 bit and your ratchet handle
Remove the rubber cap over the larger Allen set screw in the end of the Diamond mount. Use the larger supplied Allen wrench, loosen the mount bolt and position the mount for proper antenna operation. Replace the rubber cap. Mount your antenna on the NMO fitting.
Snake the coaxial cable through the rear door, thence to your radio. /secure the coax to the small window glass en route with aluminum duct tape.
Add the supplied PL-259 coax adapter to the supplied RG/316 coax connector
Toggle the 115 VAC at your control screen: Select “Outlets and Mods, then “Enable Cabin Outlets on Entry.” Your power supply will energize whenever you enter your vehicle and shut down when you leave.
Hook coax to VSWR Bridge, thence to your radio. Transmit with doors and tonneau closed. Your SWR should be very low!
Conclusion: There are two usable antenna mounts available for your Cybertruck™. Both should work, but you must use a door opening to get your feed line inside the cab. Someone will figure out how to feed the coax near the tonneau machinery, without gumming it up, and into the space below the rear seat! I have never used a door to pass coax. So I hope the magic cable passage will be published soon!
See Figures Below.
27 July, 2025
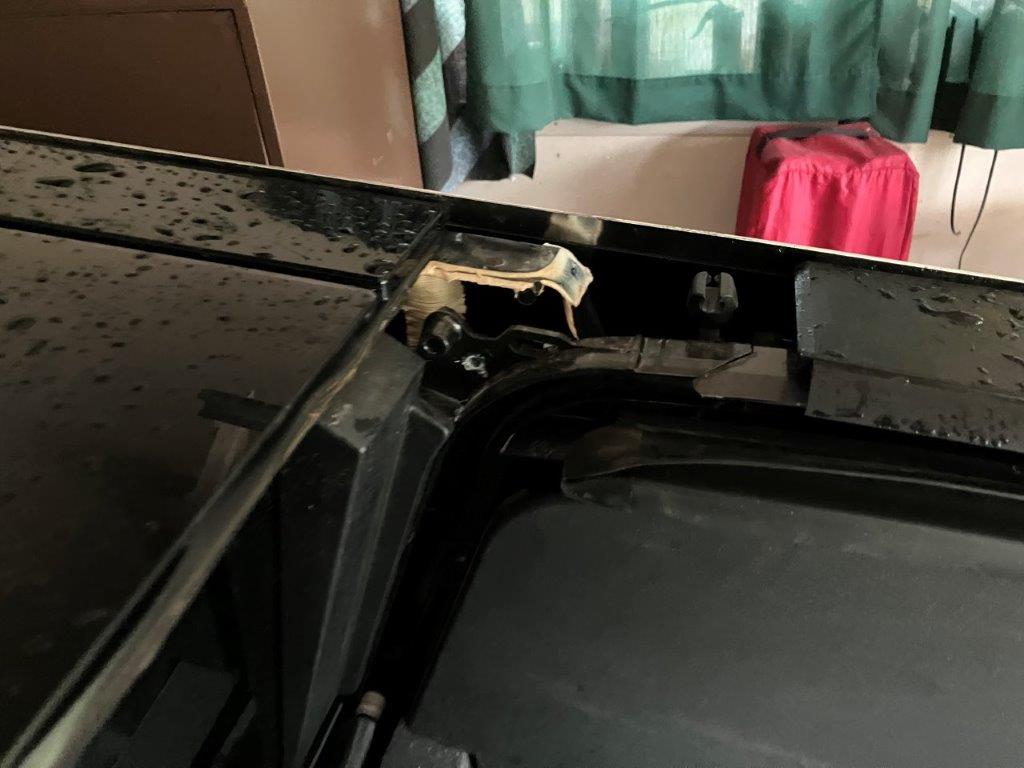
Figure 1. Cyber Antenna Mount Space
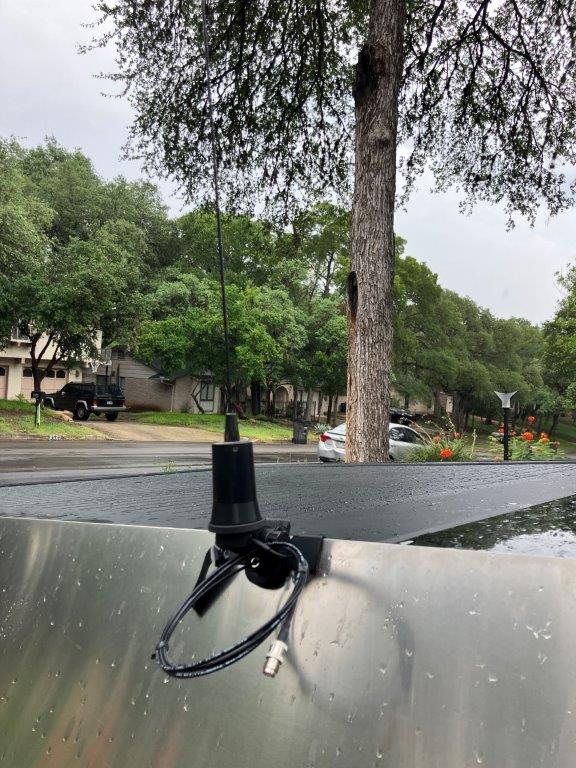
Figure 2. Cyber Diamond Antenna Mount
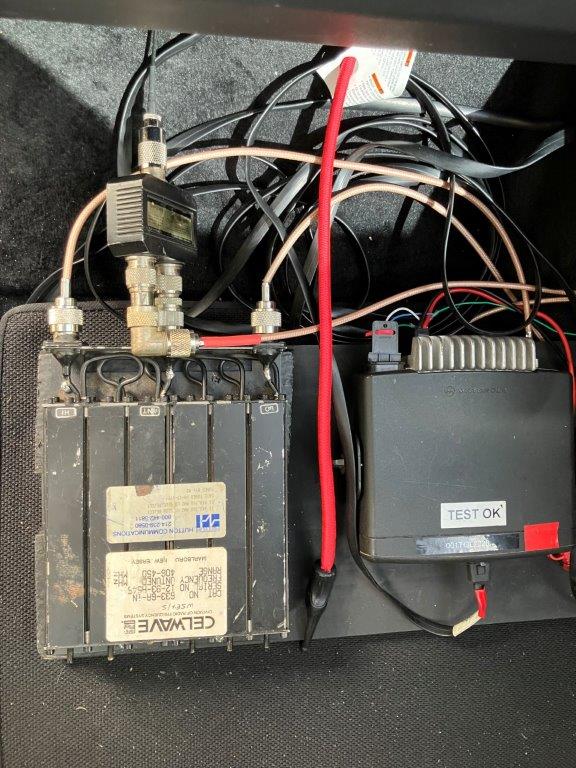
Figure 3. Cyber Dulexer Diplexer
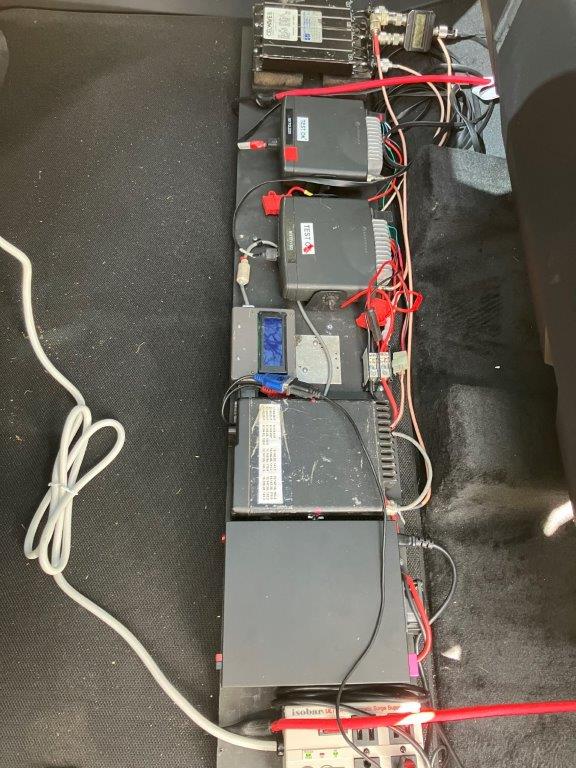
Figure 4. Cyber Duplexer, Radios, Power Supply, Surge protector.
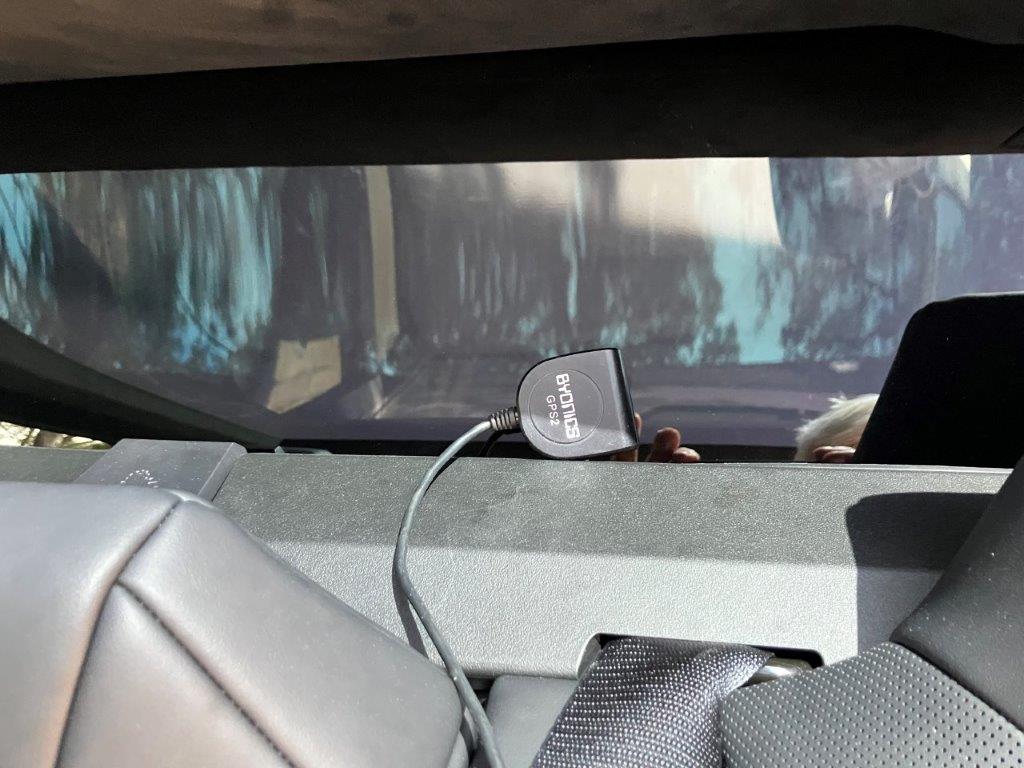
Figure 5. Cyber GPS Receiver
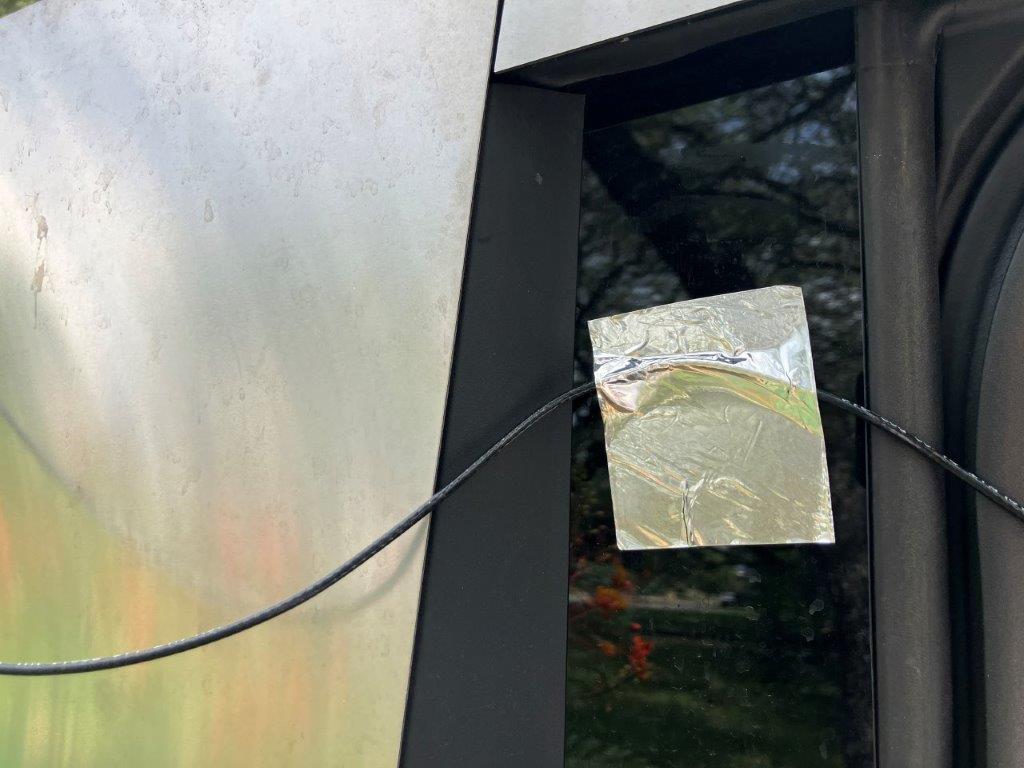
Figure 6. Cyber Radio Coax Tie Down
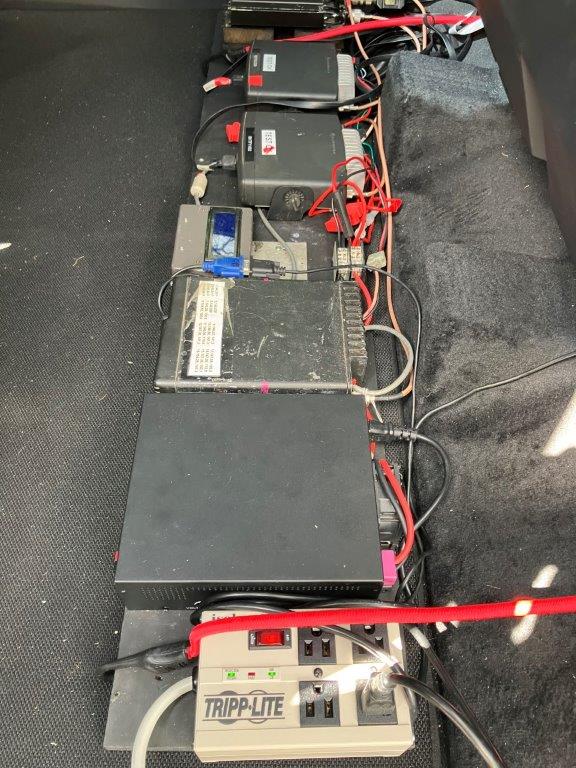
Figure 7. Cyber Radio's Bungee Strap
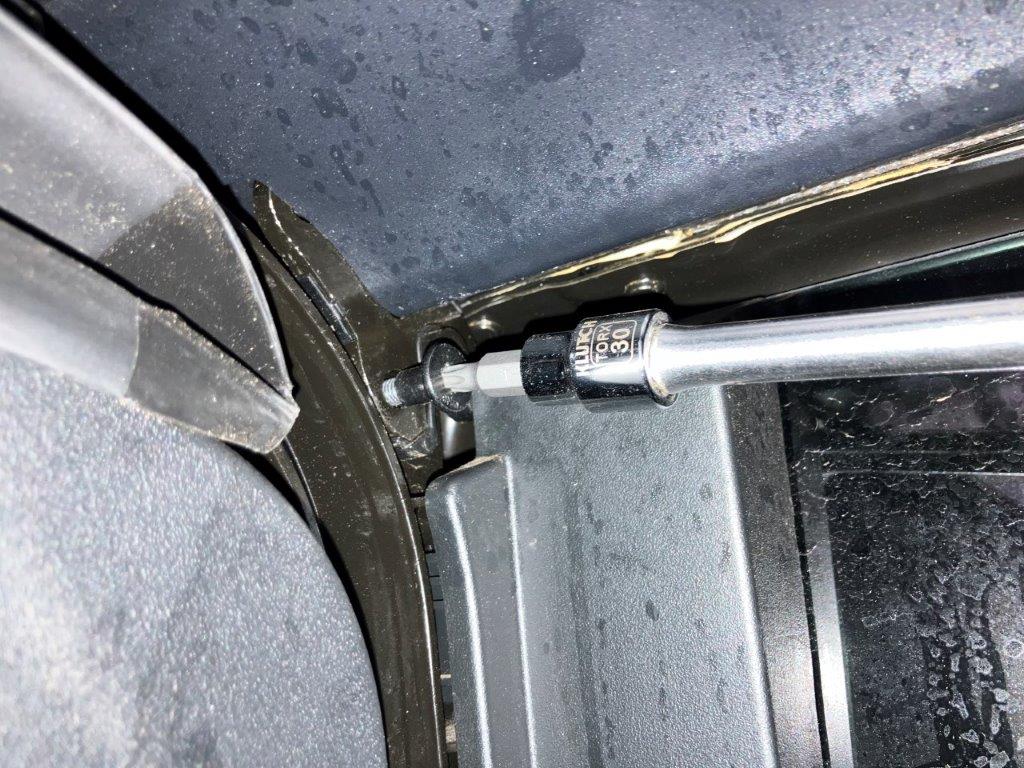
Figure 8. Cyber Toryx30 to Applique Clamp
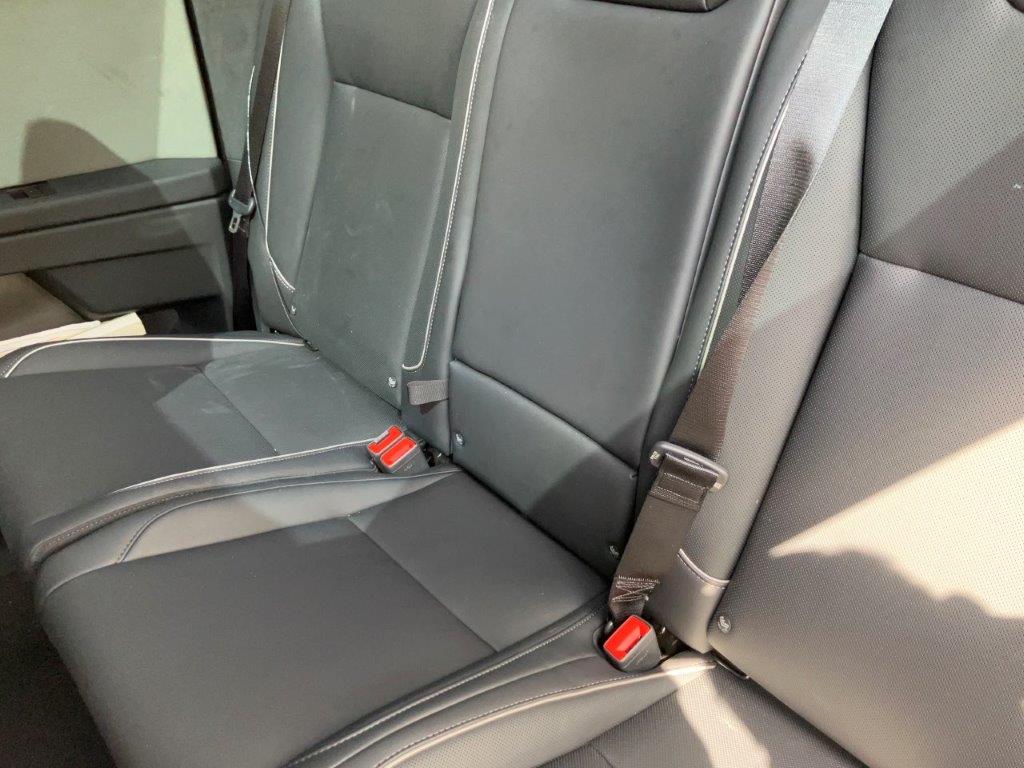
Figure 9. Finished Interior View
